Landscaping Concrete Curbing | Custom Concrete Edging for Gardens and Yards
Landscaping concrete curbing is one of the most effective ways to bring structure, definition, and long-term beauty to your yard. Whether you’re outlining flower beds, framing walkways, or upgrading tired borders, concrete edging delivers clean lines and lasting results. In this guide, we’ll walk you through how to plan and install landscaping concrete curbing—from layout to sealing—plus highlight the benefits of custom finishes and decorative styles that take your curb appeal to the next level.
Why Choose Landscaping Concrete Curbing
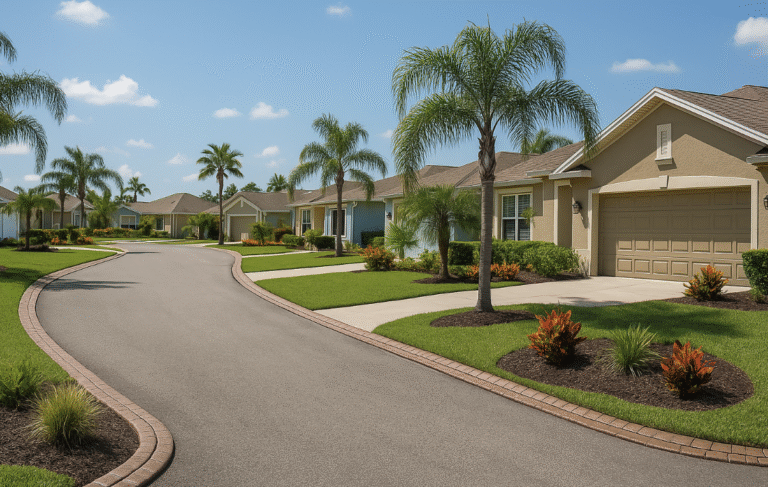
Concrete curbing provides both function and visual polish. It keeps mulch, gravel, and soil where they belong, reduces yard maintenance, and stops grass from creeping into flower beds or paths. Just as important, it gives your entire yard a clean, professional edge that instantly improves appearance. See how landscape curbing enhances your yard
Step 1: Plan Your Landscape Layout
Start by identifying the areas that need defined borders. These could include garden beds, patio perimeters, walkways, driveways, or tree rings. Map out the path using marking paint or rope to visualize curves, corners, and transitions. This planning step ensures the final result flows naturally with your landscape’s design.
Step 2: Choose a Curbing Style and Finish
Concrete curbing is highly customizable. You can choose smooth or textured finishes, natural tones or vibrant colors, and shapes that match your yard’s purpose—like mower edges for easy trimming or angled borders for a decorative flair. Popular decorative upgrades include:
- Stamped patterns that mimic stone or brick
- Integral color or acid staining
- Gloss or matte sealants for added protection
- Curb profiles like slant, square, or round-top
View our Decorative Concrete Options
Step 3: Prepare the Site
Clear out grass, weeds, debris, and any old edging. Once the area is clean, level the ground where the new curbing will be installed. Installers will typically use a ground saw or shovel to create a trench or guide for the concrete machine to follow. Proper prep ensures the edging sets evenly and holds its shape over time.
Step 4: Install the Concrete Curbing
This step is handled using a specialized curb machine. The concrete is mixed on-site, then poured and extruded directly into the desired shape. The installer smooths and textures the surface while it’s still wet. Most residential installs take less than a day, depending on linear footage and complexity.
Step 5: Seal and Protect Your Curbing
Sealing is critical to preserve the look and strength of your curbing. It protects against UV fading, water penetration, staining, and surface wear. Most installers recommend resealing every 2–3 years, especially for colored or decorative finishes. This small step adds years to your curb’s lifespan.
Where to Use Concrete Garden Edging
Concrete garden edging works in nearly every part of your landscape. It’s commonly used around:
- Flower beds
- Trees and shrubs
- Patios and seating areas
- Lawn-to-walkway transitions
- Driveway borders
By clearly separating areas of your yard, you create a more polished and organized layout. It also improves drainage, minimizes erosion, and makes routine yard work faster and easier.
Benefits of Custom Landscape Curbing
Custom concrete curbing allows you to match your property’s style and personality. Whether you’re building a modern outdoor space or refreshing a classic yard, it can be tailored with:
- Colors that complement your home
- Patterns that reflect natural materials
- Shapes that enhance both function and flow
Concrete curbing is also a long-term upgrade. Once installed, it doesn’t shift, fade, or rot like wood or plastic. It holds its form and finish year after year with minimal upkeep—making it a smart investment for property value and appearance.
Call for a Custom Quote
Want to upgrade your outdoor space with durable, custom edging? Contact CurbScaping today for a free quote on landscaping concrete curbing.